The Brushes
Let's go ahead and get the Brush thing out of the way. I know that seems to be very important to folks. (Me included) So for Part B, I'll go into which brushes I use in Photoshop. You can download my brushes at the end of this post!
I primarily work with two brushes in Photoshop. The brush that I use when I sketch and the brush that I use when I paint.

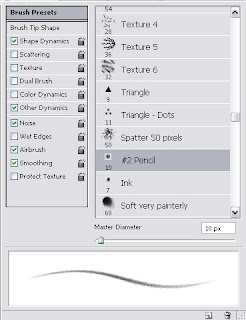
The brush used when I sketch is the #2 Pencil Brush. An artist on deviant art posted it and I downloaded it, among others, and loaded it into Photoshop in addition to the brushes that came standard. I like to work with the brush set to a light blue to replicate the color of pencil I like to use when I sketch. Non photo blue! But other light tones work just as well. Again this aids me in the non permanent feel and helps working with the tablet feel familiar by reproducing the look and feel of the tools that I use when sketching traditionally.
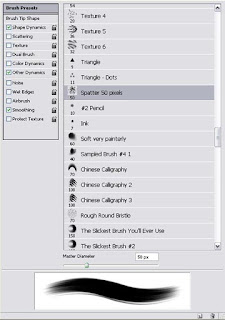
Ok, I figured out the ORIGINAL name of the brush that I use to do most of my painting in Photoshop. I use the 50 pixel Spatter Brush. The settings I use are the standard ones set when they arrive with the Program. I like that it can give a rough and painted feel if wanted. Though I have yet to get that to my satisfaction! So more experimentation is warranted!

I get the most variance in texture and application from the brushes by varying the Opacity. My go to settings are 5, 15, 25, 50, 75 and 100 percent Opacity. 50, 75 and 100 when I am blocking in the colors. 5, 10, 15 and 25 when I am blending them together. This works out best for me in conjunction with varied layer effects and whatnot.
To get good blends I pick one color to blend with and eye drop it. Then with the Opacity set to 25 or 50 percent I paint slightly over the color I want to blend to. Then I eyedrop the color created and repeat the process lightening the Opacity as I progress. If I really want the transitions smooth I'll go all the way down to 5 percent, but I rarely need to go below 15. The chunkier you want the color transitions, the higher the opacity you use. The eyedrop tool is your friend, well it's mine anyways! As is Quick-Keys, learn em!!!

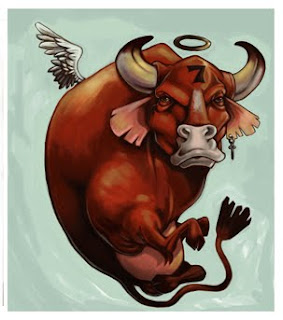
To the left is the first image I freestyle painted in Photoshop. Before that I used a system of curves and channels that is common in the T-Shirt and print industry. So experiment, learn and repeat over and over again. The one thing you can't do is get worse!
I've uploaded my brush set and it is here to be downloaded! This set includes the standard brushes that come with Photoshop. So I advise saving your Brushes before you load new ones in! Enjoy!
Back to painting in Banjo Pig-Sizzlin Bacon Proc. Part C, coming soon!
Back to painting in Banjo Pig-Sizzlin Bacon Proc. Part C, coming soon!

3 comments:
thanks for the brushes Wilson. I usually paint in corel and finish in photoshop but CS5 is pretty cool for painting now. I'm a big fan of the #2 pencil in painter 11, maybe this one will work as well :)
I am still ALL the way back on CS2 with my Photoshop!!! Maybe if I upgraded, It would be easier for me to get the more natural painted look I crave!
Hey Wilson! Thanks for all the great info! I am self taught, so I’m always looking for new and better information. The opacity trick sounds like a keeper! I’m gonna try it on my next illo. Sad news about tricycle press. I’m heading over to Jennifer’s blog right now for the rest of the story. Thanks for the brushes!
Post a Comment